Showing posts with label Crafts. Show all posts

Sunday, January 23, 2011

Family name sign

A cute idea that I have seen floating around blog land is an adorable family name sign that says the family's last name and the year the family was established.  I think this is a great piece to add to the decor in your home to make it more personal and also I think this makes a great gift for newlyweds.  So when my sister called me up and asked me for some gift ideas for a bridal shower I was excited to try this project!  It was really simple and not too time consuming.  I cut out the words on my cricut, and because I am still learning the different letter sizes it took me a few trys to get the fit just right, normally this project should take no more than about 20 minutes.

Materials needed:
  • a frame of your choice
  • assorted paper
  • glue
  • cutting machine or scissors if you want to free hand the letters
I used another one of the 75 cent frames I had on hand and it was the perfect color already so I did not even have to whip out the handy dandy spray paint! Yay!  I love saving steps!

Oh and if you are doing this project late at night I suggest adding a Starbucks frappuccino drink to your list of materials needed! :)  Yummy!


First thing I did was measure out my patterned paper to fit in the frame...because of the size frame I used I had to piece together to pieces of paper.  I used the glass of the frame to trace around for an easy error proof way to measure. 


Then, I used my cricut to cut out the letters and numbers.  I used the Cricut Classic Font cartridge for the name and year and I used the Cricut Wild Card cartridge to cut out the "est."

Last, I glued all the letters onto the patterned paper and put it in the frame....and here is the finished product...

Super easy and cute!  Personalized gifts are the best!  I am linking up to Craft-O-Maniac link party.
Have a happy day!

Saturday, January 15, 2011

Cricut Craftyness

In the great state of SC we don't usually see much snow...but lately we have had our share of that wonderful white stuff.  So due to being stuck inside I have had much more time to play on my cricut and create.  I am so thankful to have it because I may have gone crazy from the containment of my house if not for it!  Anyways, I wanted to share some of my latest creations!


First Project!  A little home decor


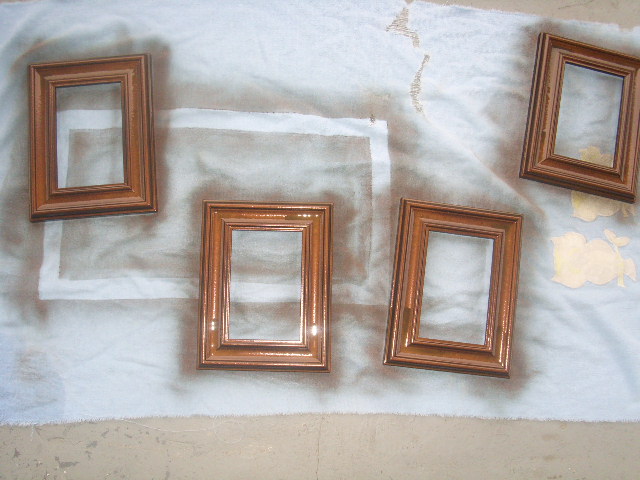
Step 1:  I sprayed some frames that I bought for 75 cents each


Step 2: I used my cricut to cut out the word "HOME" in brown card stock


Step 3: I traced around the glass of my frames and cut pretty green paisley card stock to fit in each frame


Step 4: I put the card stock in the frames (no glue needed) and placed them on top of my T.V. (aka my mantle)

Simple quick project that (I think) makes a big impact

Before: it needed something for sure!

After

Total cost of project: less than $6
SUPER!!


Second Project!  Baby name sign for my friend's new baby girl

Step1: I spray painted another frame I got for 75 cents

Step 2:  I used my cricut to cut out the name and tree branches


 Step 3: I cut a piece of green card stock to fit in the frame
and cut the birds out of a printed piece of card stock
Step 4: I glued everything and put it in the frame


Total cost of project: less than $5


Third project!  Birthday card and envelope for my nephew

I didn't take step by step photos of this project, however, it was super simple too.  I used my cricut Wild Card cartridge to cut everything.


Well I hope that these simple and inexpensive projects have inspired you!  I purchased all of the frames I used in these projects a while back at a store I use to work at, but great places to find frames for cheap are Dollar Tree, Ross, TJ Maxx, Good Will and yard sales!  Remember spray paint can do wonders! 

My advice: When you look at something...look at what it could become not what it is at that moment! 
I hope you have a happy day!


I am linking up to the CRAFT-O-MANIAC and Skip to my Lou link partys!

Saturday, January 8, 2011

My Cricut Expression machine is AWESOME!

Hello bloggers!  I hope that you all had a fantastic Christmas and New Year!  My Christmas was great!  My husband and I had a special first Christmas together and we enjoyed all the time we got to spend with our families too.  Speaking of Christmas...I wanted to share with you one of my fantastic Christmas presents.  I got the wonderful Cricut Expression machine!!  I had been looking at them online and wishing for one but I didn't expect to get one this soon...however, my wonderful mother-in-law surprised me!

I love the color!


And it has a pretty design on it...I know I get excited over the little things! :)


My machine came with these two cartridges


I bought these two cartridges on ebay...they were brand new in the package and I only paid about $20 for each and shipping was free!  These same cartridges sell for $79.99 in the local craft stores.  So if you have a cricut or you are looking into buying one...I suggest buying all your cartridges on ebay!


I made a personalized plate of my husband's and my initials that is on display in our kitchen.
This is the only project I have completed thus far with my cricut...but don't worry there will be MANY more!

Cost of project:
Plate = $4
vinyl = $7 (and I have plenty left over for other projects)
Total cost = $11

Not bad for personalized decor!

So I can assure you that the Cricut Expression is an awesome crafting machine!  I love it and I can't wait to share more projects with you!

Tuesday, November 9, 2010

A Little Fall Inspiration

Fall is by far my favorite season!  I have loved every moment of getting to decorate our first home during this season.  I love using pumpkins to decorate because they can stay out all season and and are appropriate decor for both Halloween and Thanksgiving.  My thinking is if you are going to spend time and money decorating, you might as well make your decor something that you can keep out for a while!  I thought I would show you a few things I have made to decorate our home for the Fall season. 

I apologize for not having step by step photos.  I did these projects before I started my blog so I only have photos of the finished products.

I made this wreath for our front door. 

I bought the wreath, pumpkin, and decorative berries from Hobby Lobby.  I love shopping at Hobby Lobby but if things are not on sale they can be a bit pricey.  They usually always offer a 40% off one regular priced item coupon.  You can print it right off of their website, here is the link... Hobby Lobby coupon

The ribbon and leaves are from Dollar Tree.  A little hot glue and whala...you have a cute Fall wreath!  I think I spent about $8 total to make this wreath!  Not too bad!


I also made these fun fabric pumpkins! 


I got the idea over at Little Big Nest Blog, if you want to make your own fabric pumpkins she explains how to do so step by step!  They are so simple and fun to make.  All you need is some fabric, a sheet of newspaper and a roll of toilet paper!  I just grabbed some sticks from my yard and added some Dollar Tree leaves, raffia, and the left over berries from my wreath for some finishing touches!  These little pumpkins have found a home on our dining room table along with some acorn filled candle holders!

I think to make all 3 pumpkins I only spent about $11.  You can't beat making your own decor...it is a lot cheaper (usually), you can make it custom to fit the decor of your home, and most of all you will have the satisfaction of knowing you made it! 

It's not too late to make some Fall decor for your house!  You know you want to...everyone has a little craftiness in them!  So I encourage you to try and make something beautiful and fun to decorate your home for the Fall season, and if you go to Hobby Lobby for any of your supplies, don't forget your coupon!  Have a happy Fall day!